Cold-Proofing Pizza Dough: 24 to 72 Hours in the Fridge
How cold fermentation transforms pizza dough - the 24, 48 and 72-hour schedules, container choice, and warming dough up for a winter bake.
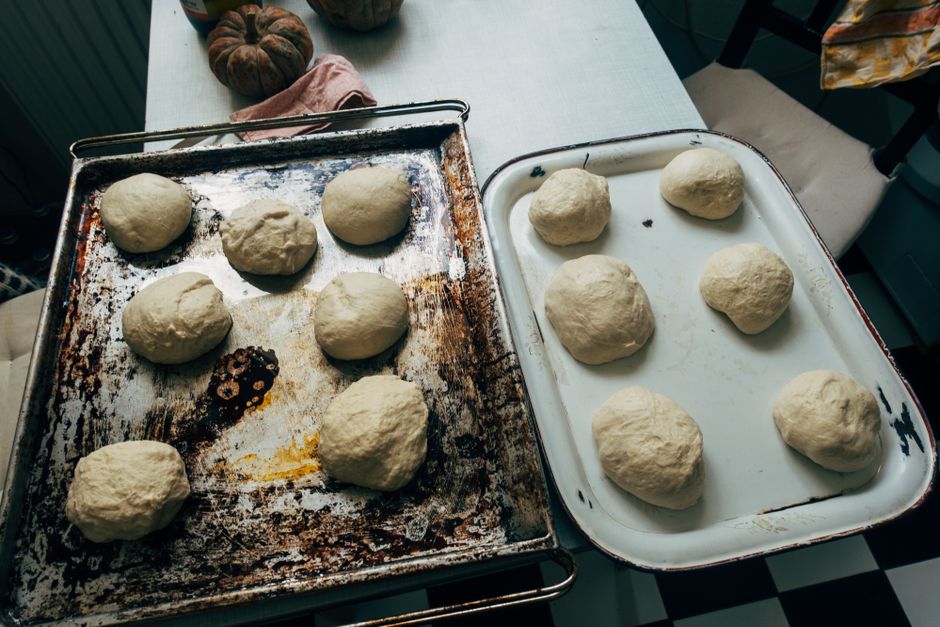
The single biggest upgrade most home pizza makers can ever apply costs nothing and needs no new kit: time. Moving the ferment from the kitchen counter into the fridge - a cold proof, in baking terms - turns the same four ingredients from our beginner Neapolitan dough recipe into a dough with real depth of flavour, a crust that browns properly, and a texture that stretches without fighting back. This guide covers why it works, the 24, 48 and 72-hour schedules, what to keep the dough in, and the one step that matters more in winter than any other: bringing it back to temperature.
Why does cold fermentation make better pizza?
Fermentation is yeast and bacteria eating the sugars in flour and leaving behind gas, alcohol and organic acids. Warm fermentation is fast and one-dimensional: the yeast races through the available sugars in a couple of hours, inflates the dough, and stops. Chill the dough to fridge temperature (around 4°C) and yeast activity slows to a crawl, but the enzymes in the flour keep working. Amylase enzymes (proteins in the flour that break starch into simple sugars) carry on quietly for days, and the acid-producing bacteria keep contributing flavour compounds long after the yeast has gone dormant. Bakers call this slow, cold schedule retarding - see the proofing and retarding background on Wikipedia for the chemistry in more depth.
The practical results show up in three places. Flavour: a 48-hour dough tastes noticeably more complex - slightly tangy, almost nutty - where a same-day dough tastes of very little. Colour: the sugars the enzymes release are exactly what the Maillard reaction (the browning chemistry between sugars and proteins) feeds on, so a cold-proofed crust leopard-spots in a pizza oven where a young dough stays stubbornly pale. Handling: the long rest relaxes the gluten completely, so the dough stretches thin without snapping back - the difference is obvious the first time you open a 48-hour ball.
Which schedule should you use: 24, 48 or 72 hours?
All three schedules start from the same base recipe and method - mix, knead, one hour covered at room temperature, then ball and refrigerate. The variable is how long the balls sit in the fridge, and the sweet spot for most people is 48 hours.
- 24 hours - the minimum worth doing. A clear step up from same-day dough in both flavour and handling, and the schedule fits neatly into 'make dough Friday evening, bake Saturday evening'. Use the yeast quantity from the base recipe unchanged.
- 48 hours - the sweet spot. Flavour and browning improve markedly over 24 hours, and the dough is at its most relaxed and extensible. If you are planning a weekend pizza night, mixing on Thursday for a Saturday bake is the schedule to build the habit around.
- 72 hours - the ceiling for a standard recipe. Flavour keeps developing, but the dough is now living on borrowed time: the enzymes that soften gluten eventually weaken it, and past three days the balls slacken, over-relax and can tear when stretched. If you want to push to 72 hours regularly, cut the yeast by roughly half so there is fuel left in the tank.
Whichever schedule you choose, the gas the dough produces in the fridge is part of the plan - expect the balls to grow by half again and go pillowy. What you do not want is balls that have flattened into pancakes and smell sharply of alcohol; that is over-fermentation, and the schedule (or the yeast quantity) was too long for your fridge.
What should you proof the dough in?
The container matters more in a fridge than on a counter, because three days is a long time to fight drying air. The requirements are simple: airtight or close to it, room for each ball to grow by at least half, and a flat base so the balls keep their shape.
A purpose-made dough proofing box - a shallow, stackable plastic tray with a lid - is the tidy solution, and one box comfortably takes four to six balls with growing room. But nothing about it is essential: a large lidded food container works exactly as well, and individual takeaway tubs (one ball each, lightly oiled) are the budget option with a bonus - each ball comes out untouched by its neighbours. What does not work is a bowl with cling film stretched over it holding all the dough as one mass; the balls prove into each other and you lose the neat, tight rounds that stretch evenly.
Two small habits prevent the classic failures. Dust the base of the container lightly with flour or oil it thinly, or 72-hour balls weld themselves to the plastic. And leave headroom: a lid resting on risen dough sticks, tears the surface, and deflates the ball as you free it.
How do you bring cold dough back to temperature?
Cold dough is stiff dough. Straight from the fridge, the gluten is tight, the gas in the dough is compressed, and a ball stretched immediately fights back, tears, and bakes up dense. The fix is patience: take the balls out, keep them covered, and let them stand until they reach cool room temperature right through - 1 to 2 hours in a summer kitchen, 2 to 3 hours in a winter one.
This is the step the winter bake punishes. A kitchen at 16°C in January warms dough roughly half as fast as a 24°C one in July, and an outdoor pizza session adds its own delay: dough carried straight to a cold garden table keeps chilling while the oven heats. The winter routine that works is to pull the dough before you do anything else - before lighting the oven, before prepping toppings from our 60-second toppings guide - and to leave it somewhere genuinely room-temperature, not by an open back door. If the kitchen is cold, an oven with just the light on, or a microwave with a mug of boiled water in the corner, makes a serviceable warming cabinet.
The test is touch, not the clock: a ready ball feels soft and slightly puffy, dents gently under a fingertip, and the dent springs back slowly. Cold dough feels firm and dense, like modelling clay. If dinner is an hour away and the dough still feels cold, move it somewhere warmer rather than stretching it early - of all the corners to cut, this is the most expensive one.
The cold-proof routine at a glance
Mix and knead as normal
Follow the base recipe: dissolve yeast in water, mix in flour, add salt, knead 8 to 10 minutes.
Rest one hour at room temperature
Covered, so the ferment gets started before the cold slows it down.
Ball and box
Divide into 250g balls and set them in a lightly floured or oiled, lidded container with growing room.
Refrigerate 24 to 72 hours
Middle shelf, away from the back wall. 48 hours is the sweet spot; halve the yeast if you plan on 72.
Warm up before the bake
Out of the fridge, still covered: 1 to 2 hours in summer, 2 to 3 in winter, until the balls feel soft and relaxed.
Frequently asked questions
Can you cold-proof pizza dough for more than 72 hours?
Does cold dough need to come back to room temperature before baking?
Can you freeze pizza dough instead of cold-proofing it?
Why did my dough balls flatten out in the fridge?
Is cold-proofed dough better for a pizza oven than a home oven?
Neapolitan Pizza Dough for Beginners
Pizza Dough Calculator

Pizza Toppings That Work in a 60-Second Bake

Pizza Oven Troubleshooting: Soggy Base, Burnt Top